2D Rigging Lab
This lab was created using Adobe Animate CC version 21.0.1
In this lab we take Adobe Animate and use it for its main purpose, which -- contrary to popular belief -- is not used for drawing and animating individual frames. Instead we are utilizing Animate's ability to use symbols and construct a "rig" to tie them all together and animate them.
What this system allows us to do is simulate the principles of ease in/ease out without having to animate a character frame by frame. For those who are similar with 3D animation, this is exactly the same method of tangent curves.
However, it should be noted that these animations tend to be closely related to typical "corporate" animations with janky and unrealistic motions. But this is only the case if you try to use rigs for an animation that far out-reaches the dimensional limitations of puppet rigs.
However, it should be noted that these animations tend to be closely related to typical "corporate" animations with janky and unrealistic motions. But this is only the case if you try to use rigs for an animation that far out-reaches the dimensional limitations of puppet rigs.
part I: Asset setup
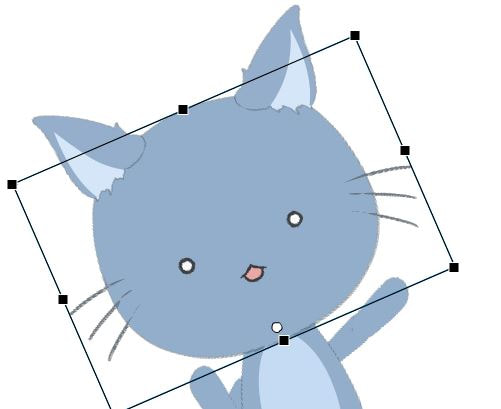
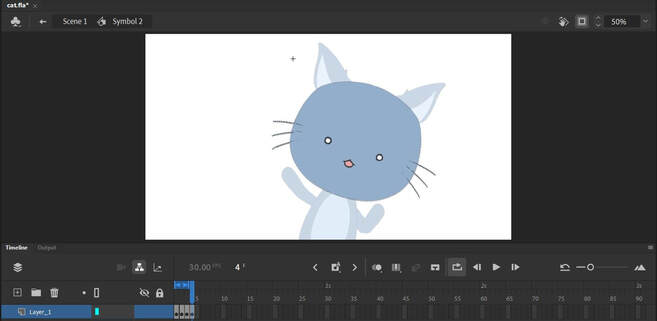
Here we have a cat, doing its cat thing. This animation was done using anchor points, a series of parenting, and animation via only rotations.
Here are some important things to note with the puppet rig work-flow
Here are some important things to note with the puppet rig work-flow
part 1.1 - PIvot points
Pivot points, both in Animate and other standard drawing programs, is the point by which the selected object will rotate around. In the above image, for example, the cat's head will rotate around the small point on its chin. This is important to help emulate the way a real cat's head would rotate around the base of its neck, rather than in the center of its face.
This becomes even more apparent for limbs, where you would have your pivot points on the shoulder and the elbow.
This becomes even more apparent for limbs, where you would have your pivot points on the shoulder and the elbow.
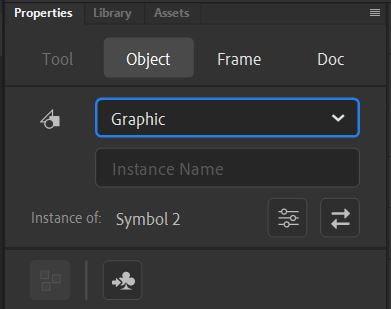
NOTE: Animate is very picky about the type of object you are attempting to work with. If you ever find yourself unable to move the pivot point of an object (i.e. it keeps resetting after you click away), then check to make sure that your object type is not "Mixed." If it is, use the little clover icon to turn the object into a Graphic symbol and it should work fine.
NOTE: When importing images from other drawing programs, consider how big the canvas is in relation to the actual image. Animate will remember the size of the canvas and have that entire transparent space be selectable.
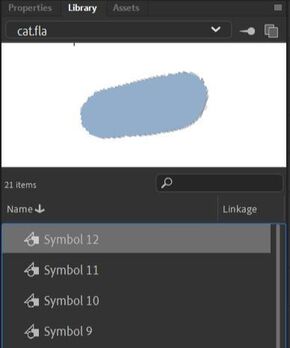
Also, to edit a symbol, you can double click on the icon next to each individual symbol and it will open up in the canvas to be edited.
Also, to edit a symbol, you can double click on the icon next to each individual symbol and it will open up in the canvas to be edited.
part 1.2 - parenting
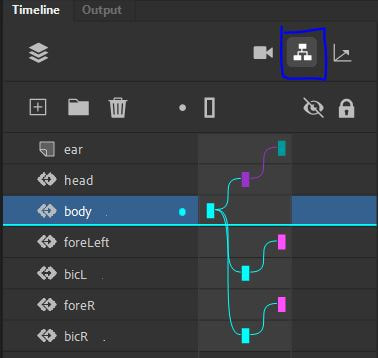
Here we see the system of parenting between layers. Make sure that each moving part is on its own layer.
To open up the parenting interface, first click on the icon noted by the blue box.
Then to parent one layer to another, you need to drag from "child" to the "parent." With this, if you ever translate, or rotate the parent, the child will move the same way
To open up the parenting interface, first click on the icon noted by the blue box.
Then to parent one layer to another, you need to drag from "child" to the "parent." With this, if you ever translate, or rotate the parent, the child will move the same way
part 1.3 Frame picker
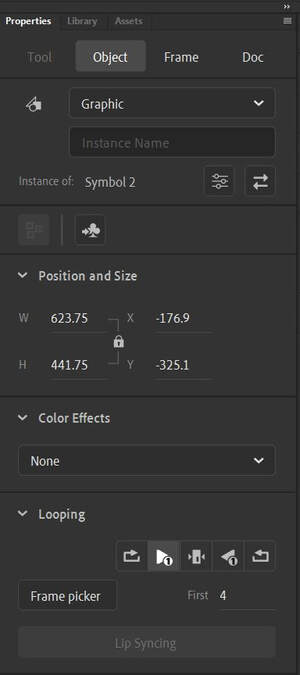
Another useful function of Adobe Animate is the frame picker. What this allows you to do is embed and actively shift between different images on one track of animation. This is particularly good for changing faces, hand positions, and any other parts of the body that will internally shift between different states.
To access this, double click on any object and it will open on a separated window, with its own individual timeline. Here you can add in frames and create an embedded animation that will play even while in the main timeline. This can then be halted by choosing a frame from the Frame Picker.
To access this, double click on any object and it will open on a separated window, with its own individual timeline. Here you can add in frames and create an embedded animation that will play even while in the main timeline. This can then be halted by choosing a frame from the Frame Picker.
Choosing a frame and setting the option to "Play graphic once" the layer will not cycle through and instead stay as the chosen frame.
With this, we now have everything we need to start animating!
With this, we now have everything we need to start animating!
Part 2: Motion tween animation
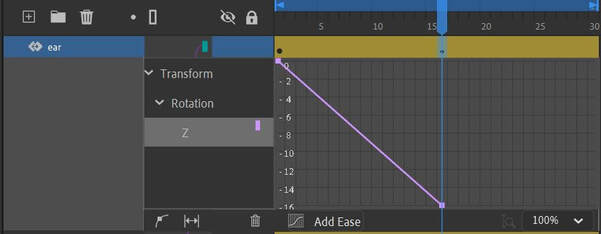
To add a motion tween to any layer, right on any frame on that layer and click "Create Motion Tween." You will know if this worked if the frames turn yellow and the icon next to the layer name changes as shown above. To open up the graph, you can double click anywhere motion tween frame.
On your end, it will probably be empty at first. So to start things off, you want to manually transform your object at the frame of your desire. Doing so will create a keyframe and look something like this:
On your end, it will probably be empty at first. So to start things off, you want to manually transform your object at the frame of your desire. Doing so will create a keyframe and look something like this:
With this "curve" the object will transform from the initial point to the keyframe you set. And as we learned last week, that doesn't look good. You want to have the motion ease in and ease out to give it a more smooth and realistic emulation of motion.
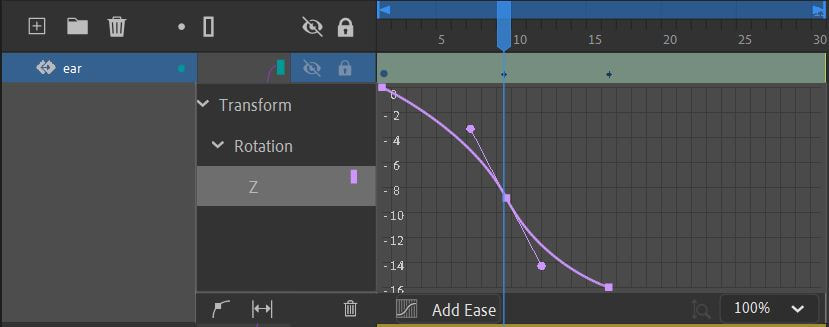
To do so, click on the small icon in the bottom left, "Add anchor point on graph" and click somewhere in between the two keyframes.
To do so, click on the small icon in the bottom left, "Add anchor point on graph" and click somewhere in between the two keyframes.
Notice how this warps the graph into a curve, and the two points sticking out of the anchor can be adjusted through rotating, shifting, or extending it. We can look at the graph all we want, but the best way to visualize what this actually does is to experiment and change the arc of the curve.
This marks the end of puppet curves, and we now move onto Skeletal Character Rigs.
This marks the end of puppet curves, and we now move onto Skeletal Character Rigs.
